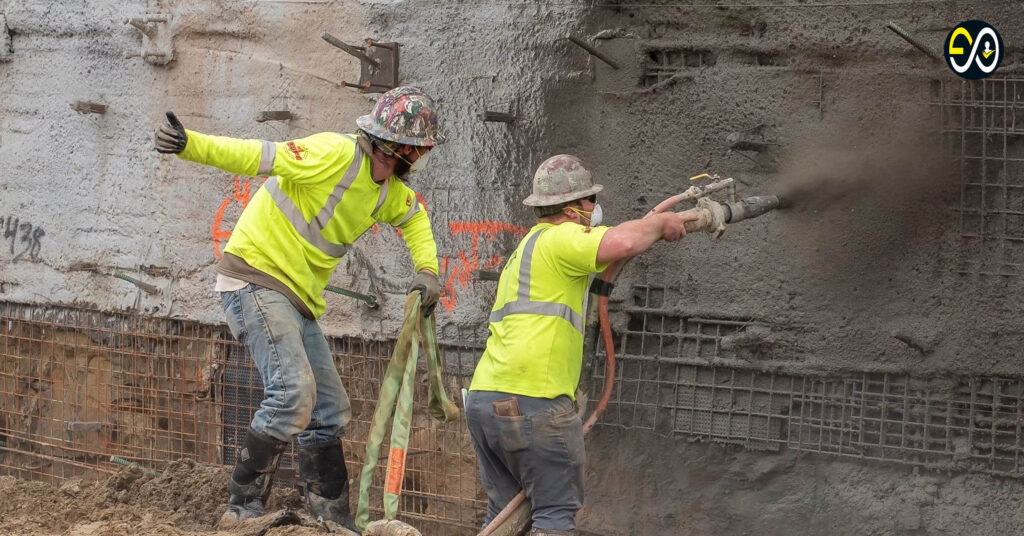
Soil nailing is a widely used geotechnical technique for stabilizing slopes, retaining walls, and excavations. This method involves inserting reinforcing elements (nails) into the soil, thereby increasing its overall strength and preventing collapse or erosion. Soil nailing is crucial for large infrastructure projects, particularly in areas where excavation or significant changes in soil stability are required. In this guide, we will explore the detailed steps involved in soil nailing, as well as the tools, materials, and best practices used to ensure project success.
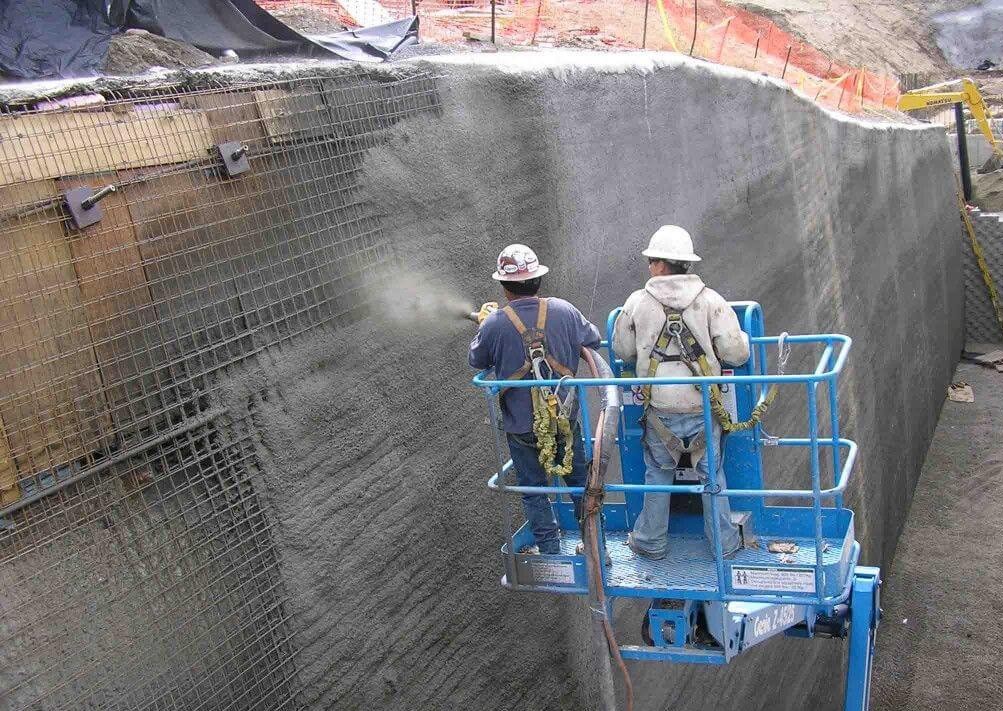
What is Soil Nailing?
Soil nailing refers to the process of reinforcing and stabilizing soil by inserting steel bars, known as nails, into pre-drilled holes within the earth. These nails are typically installed at an angle and later grouted into place, forming a composite mass between the soil and reinforcing nails. This technique is used primarily in temporary and permanent excavations, steep cut slopes, and retaining wall construction.
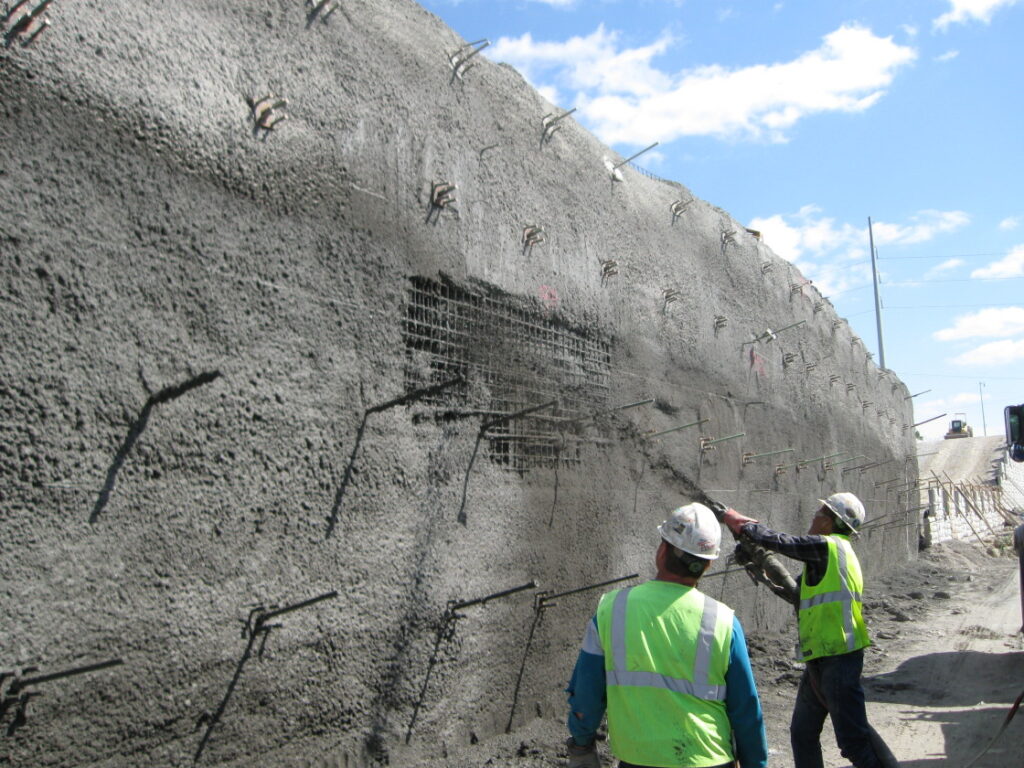
Key Benefits of Soil Nailing
- Improved stability for steep or loose soils.
- Reduces the need for massive retaining walls.
- Cost-effective compared to traditional excavation techniques.
- Suitable for urban environments with limited space.
- Adaptable to a wide range of soil types and geotechnical conditions.
Step-by-Step Soil Nailing Process
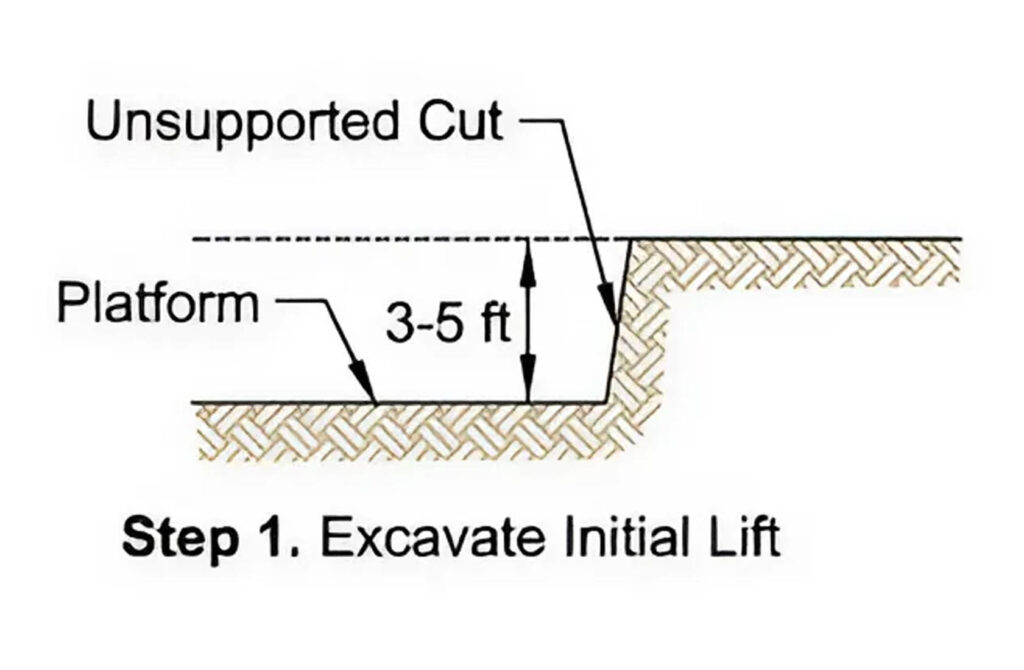
1. Excavation and Site Preparation
The first step in the soil nailing process is the excavation of the soil where the nails will be installed. The excavation typically involves removing soil in small increments, usually between 3 to 5 feet deep, depending on the soil type and project requirements. The face of the excavation must remain unsupported for 24 to 48 hours to allow for nail installation and the initial facing.
Key Considerations:
- Ensure the excavation depth is just below the planned nail installation level.
- The excavation surface should be stable enough to remain unsupported temporarily.
- The type of soil (sandy, clayey, etc.) will influence how deep the excavation can go without additional support.
2. Drilling of Nail Holes
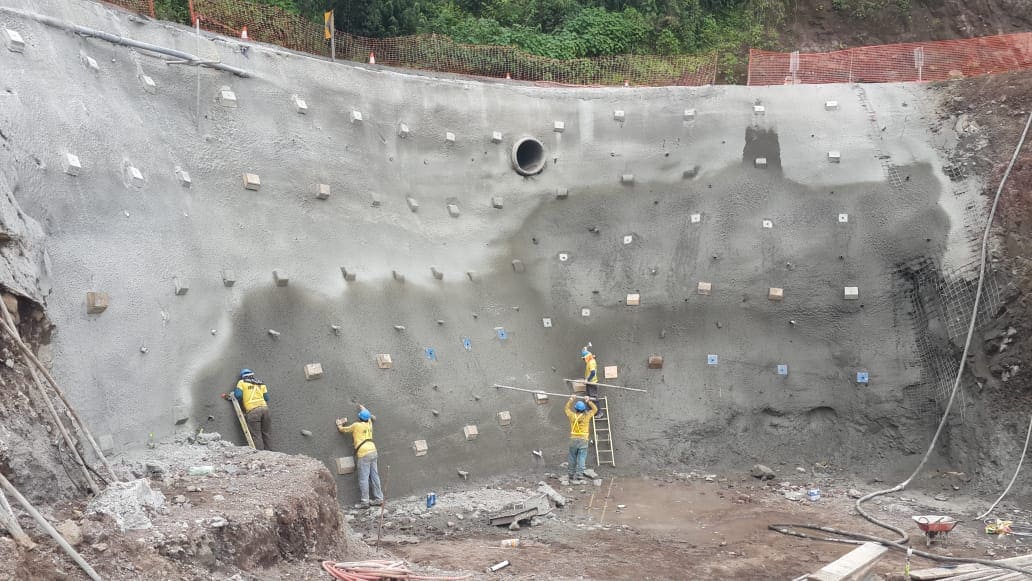
Once the excavation is complete, drilling begins to create holes for the nails. Specialized drilling equipment is used, with holes often remaining unsupported during this phase. Depending on the stability of the soil, additional support such as shotcrete (sprayed concrete) may be applied immediately after excavation.
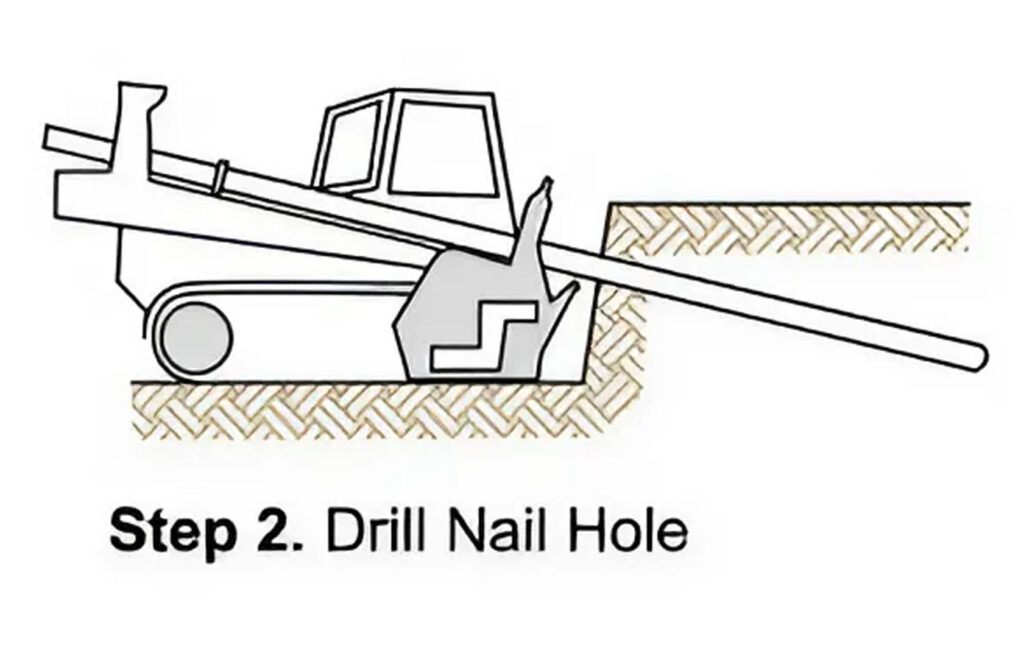
Drilling Details:
- Holes are drilled at regular intervals (usually at a downward angle).
- In cases of unstable soil, a layer of shotcrete may be applied for added stability.
- Grout is applied to the hole after drilling but before inserting the tendon, helping to secure the nail.
3. Nail Installation and Grouting
After the holes are drilled, steel tendons (the nails) are inserted into the holes. The nails are typically threaded bars made from high-strength steel, and once inserted, they are grouted into place using a tremie grout pipe. The grouting process may be completed by gravity or using low-pressure grout (typically less than 10 psi).
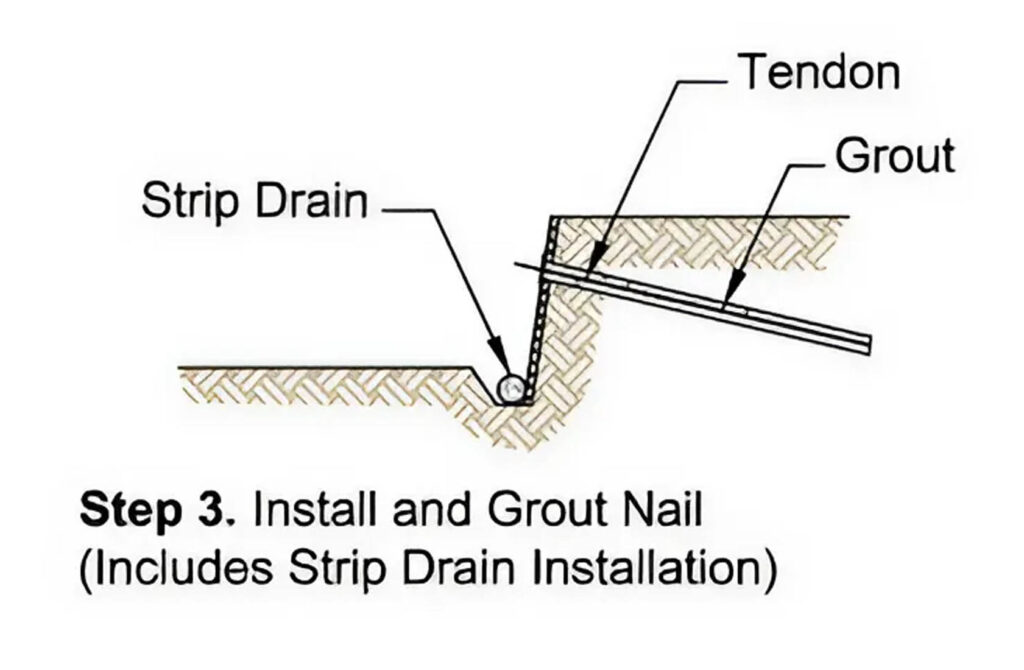
If hollow bars are used in the project, the drilling and grouting steps can be combined. The grout is pumped into the hollow core of the bar during the drilling process, speeding up nail installation and ensuring proper anchoring.
4. Installation of Strip Drains
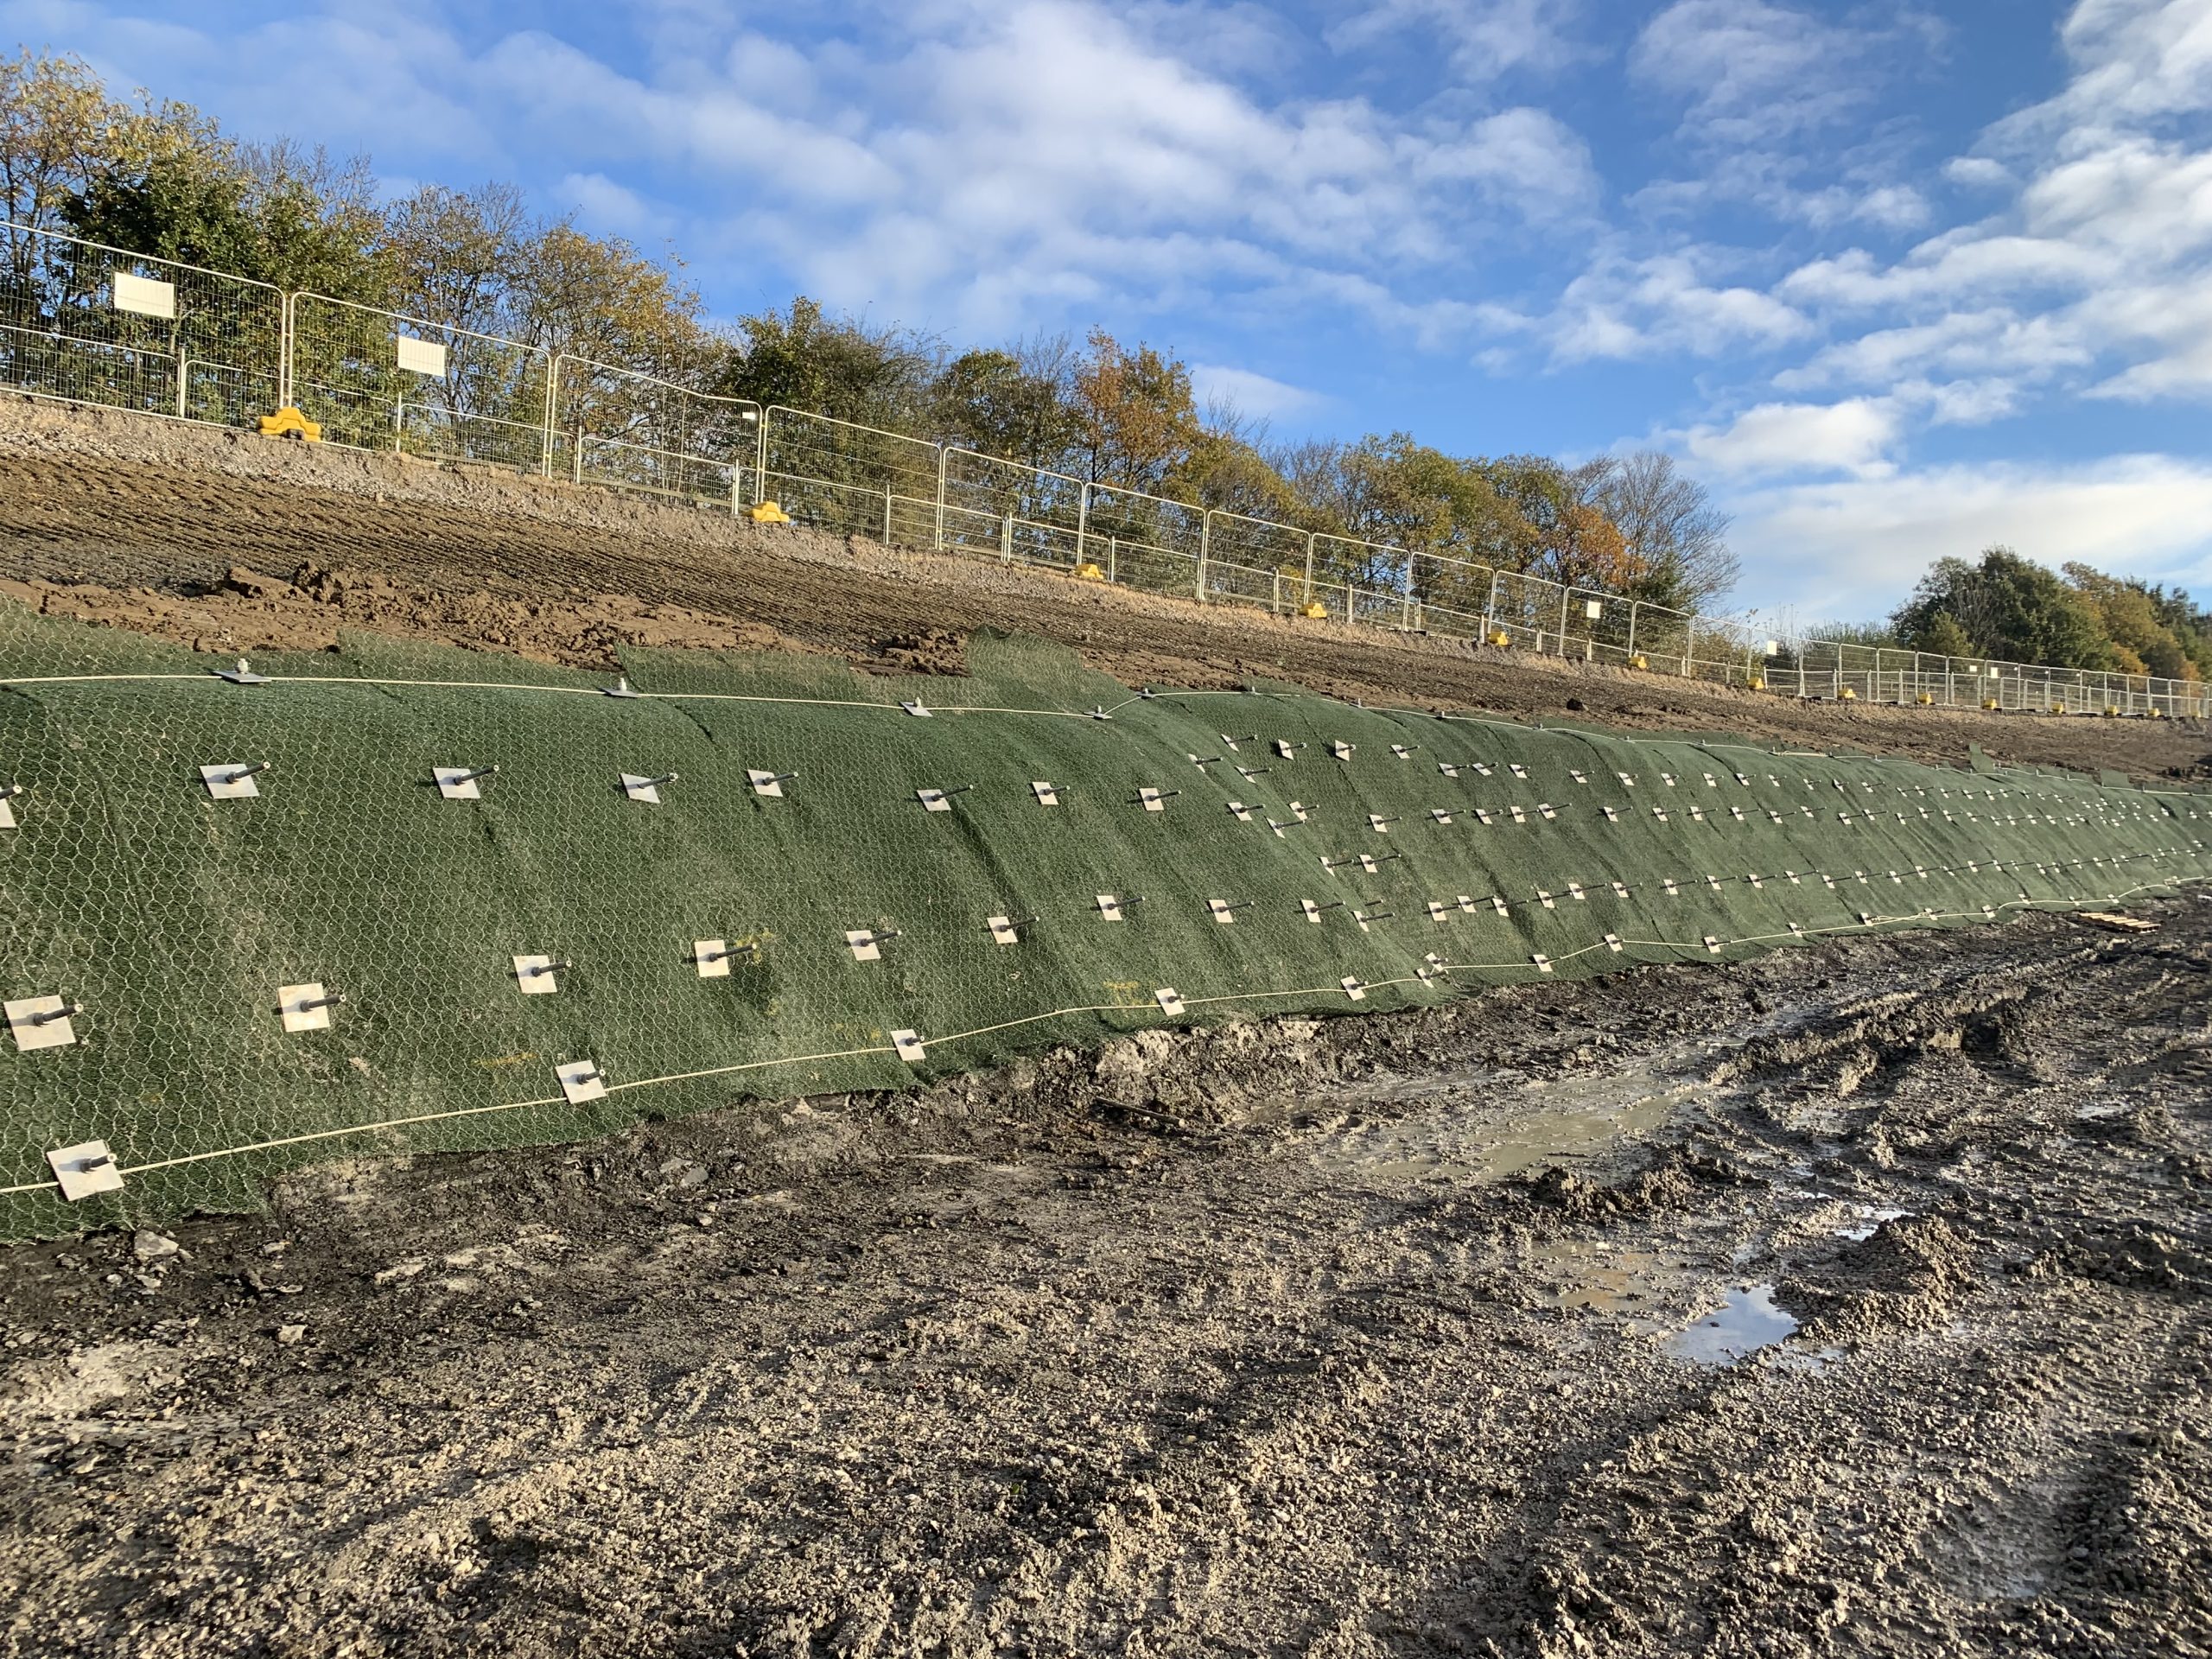
Strip drains are installed along the excavation face to manage water flow and prevent water from building up behind the structure. This is a critical step, as water accumulation can cause erosion and reduce the effectiveness of the soil nailing system. The strip drains are typically placed between the nails and unrolled down the face to the next level of the excavation.
Drainage Considerations:
- Proper drainage is essential for maintaining soil stability.
- Strip drains prevent water pressure from building up behind the retaining structure.
- Drains must be carefully aligned with the soil nail placements for effective results.
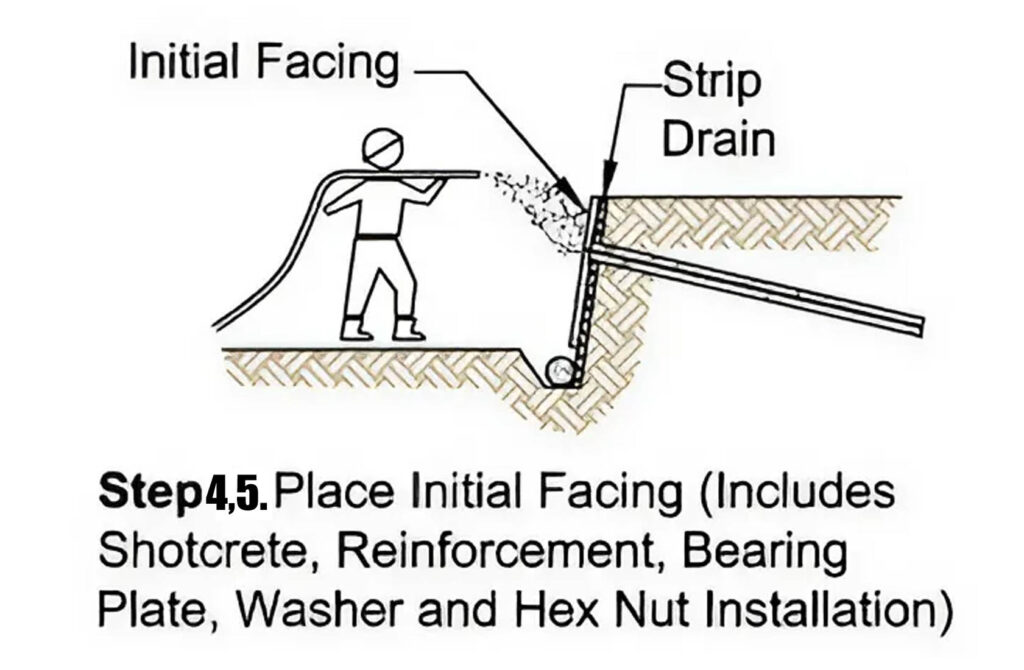
5. Initial Shotcrete Facing
Before moving to the next level of excavation, an initial layer of shotcrete is applied to the exposed soil surface. This temporary facing layer is typically 4 inches thick and is reinforced with welded wire mesh (WWM). The mesh is placed in the middle of the shotcrete, while horizontal and vertical bars are installed around the nail heads for added reinforcement.
Once the shotcrete begins to cure, a steel bearing plate is placed over the tendon where it protrudes from the hole. This plate is then pressed into the fresh shotcrete, and a hex nut and washer are installed to secure the nail in place. The hex nut is typically tightened within 24 hours.
Important Considerations:
- The shotcrete must achieve its compressive strength within 72 hours.
- Load testing may be conducted on some of the nails before the next excavation lift begins.
6. Repeating the Process for Subsequent Excavation Lifts
For each subsequent excavation lift, the process is repeated:
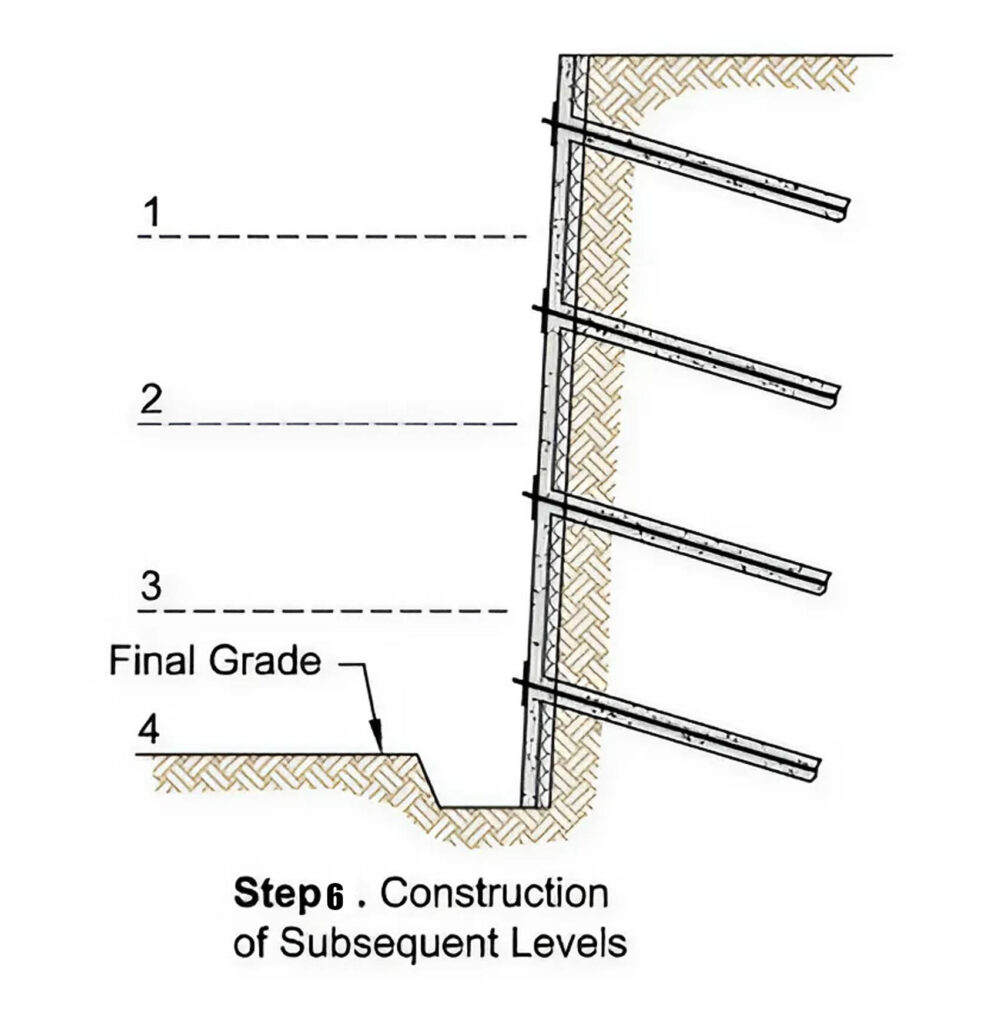
- Strip drains are extended to the new level.
- A new panel of WWM is installed, overlapping the panel above it with one full mesh cell.
- The shotcrete facing is extended to match the previous level’s shotcrete.
- Additional nails are installed, and the entire process is continued until the desired depth is reached.
7. Construction of Final Facing
Once the final level of the excavation is reached and all nails are installed and tested, the final facing is constructed. This permanent facing can consist of reinforced concrete, shotcrete, or prefabricated panels, depending on project specifications. Additionally, drainage systems such as weepholes, foot drains, and ditches are installed to ensure proper water management throughout the life of the structure.
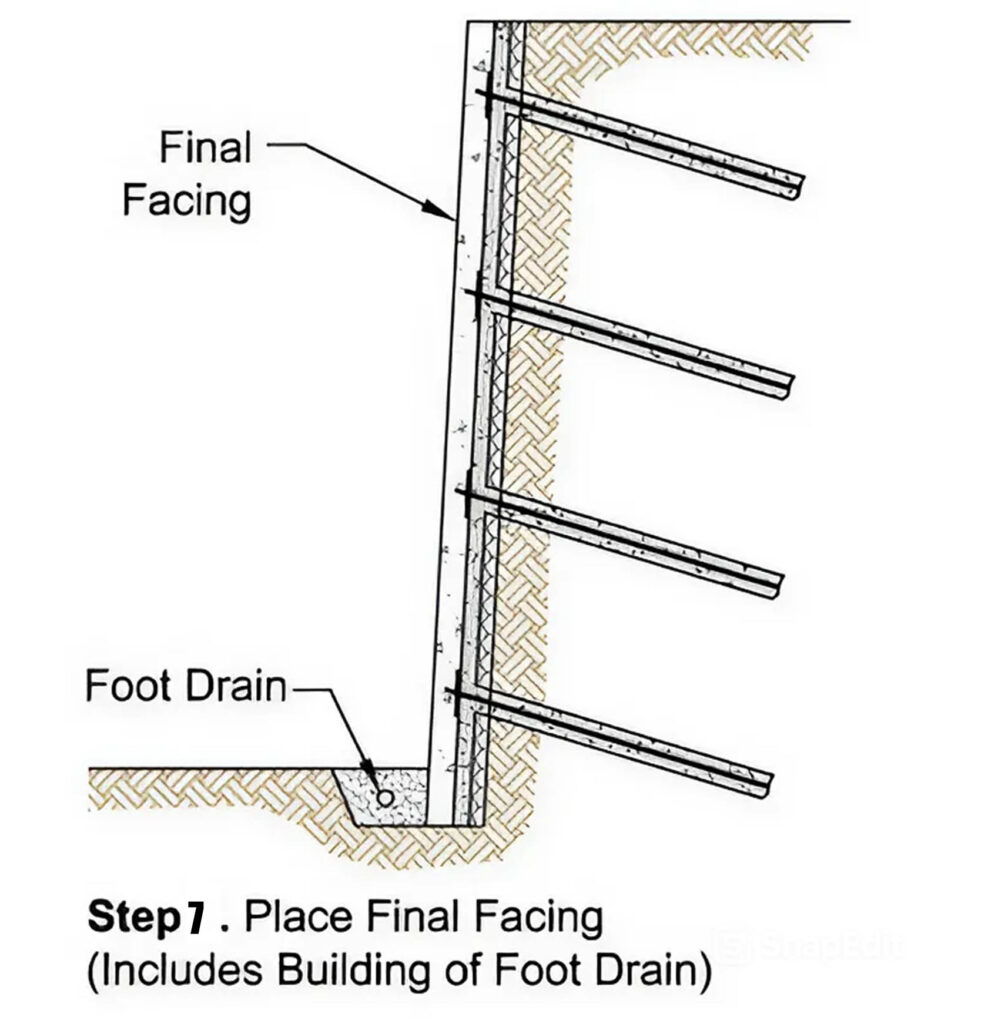
The final facing plays a critical role in the long-term stability of the soil nailing system and should be designed to withstand both external and internal pressures.
8. Soil Nailing: Maintenance and Monitoring
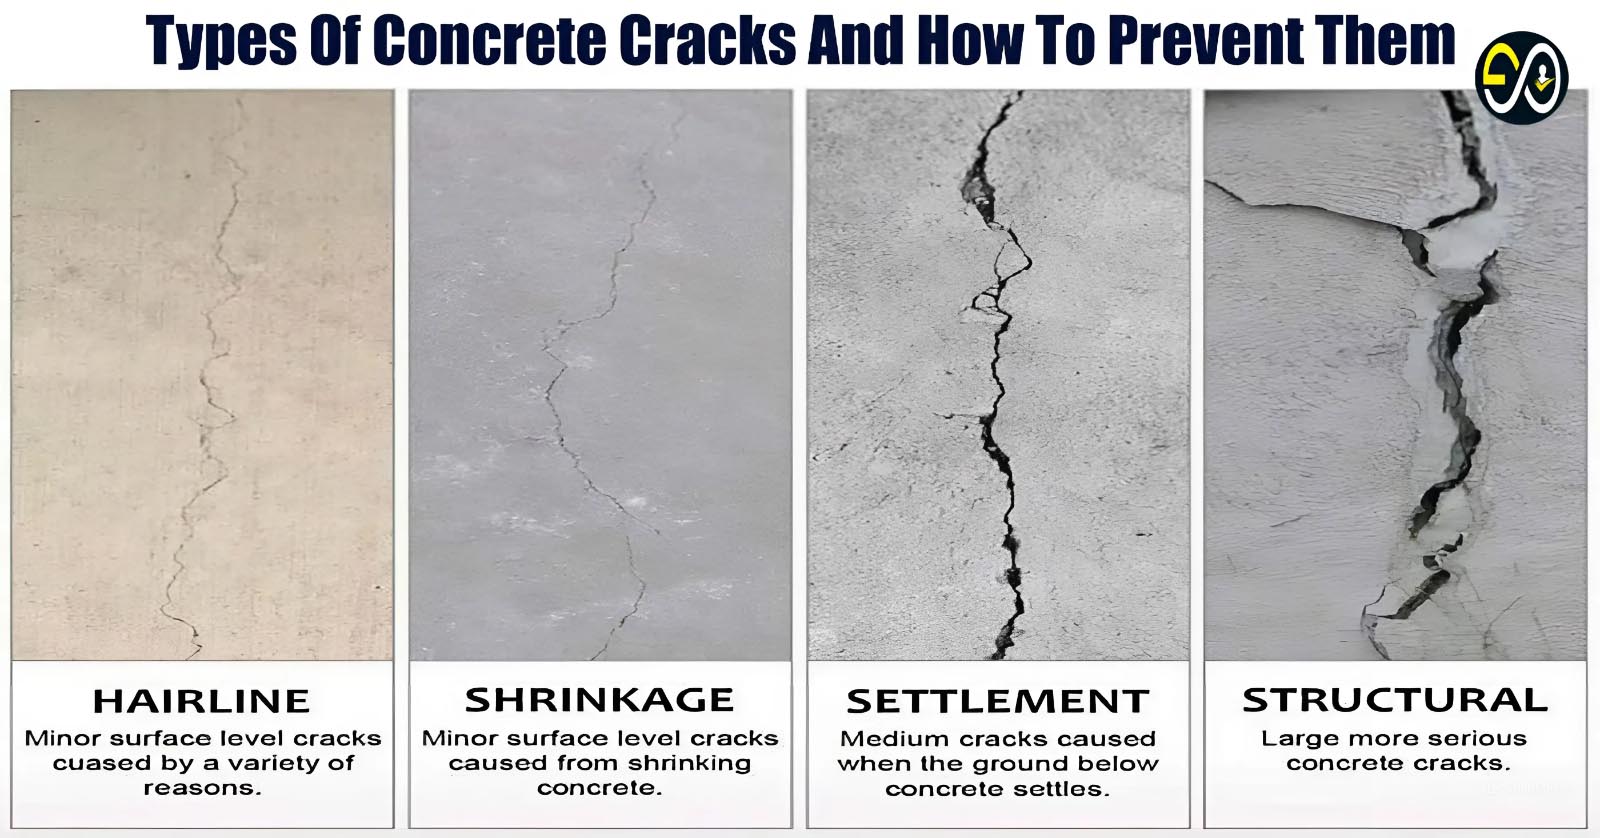
After construction, the performance of the soil nailing system must be regularly monitored to ensure it remains effective. Periodic inspections should include checking the drainage systems, assessing the condition of the facing, and testing the load-bearing capacity of the nails. Any signs of movement, water infiltration, or deterioration should be addressed immediately to maintain the structure’s integrity.

Excellent